Frozen Toy Rescue: A Toddler Ice Sensory Activity (Ages 2-4)
By Katie · Mom of 2 under 3. Founder, Screen Free Toddlers.
· 6 min read · @screenfree_toddlers
Freeze toys in ice overnight, let your toddler chip them out the next day. 5-min night prep, 20+ minutes of sensory play for toddlers ages 2-4.
Time: 20+ minutes | Age: 2-4 years | Setup: 5 min night before, 1 min day of | Mess Level: Medium
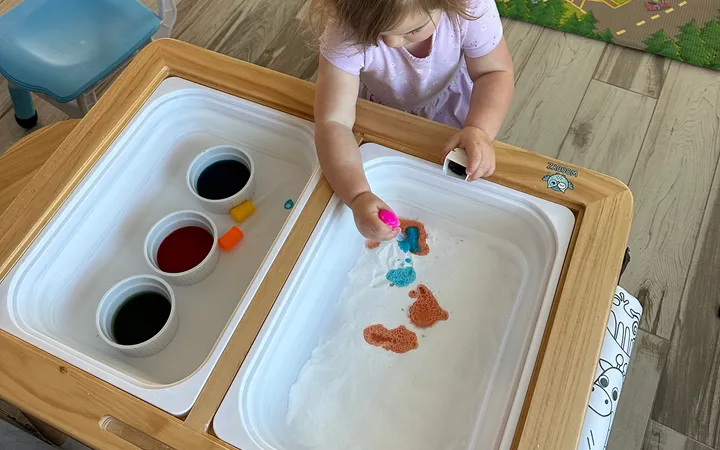
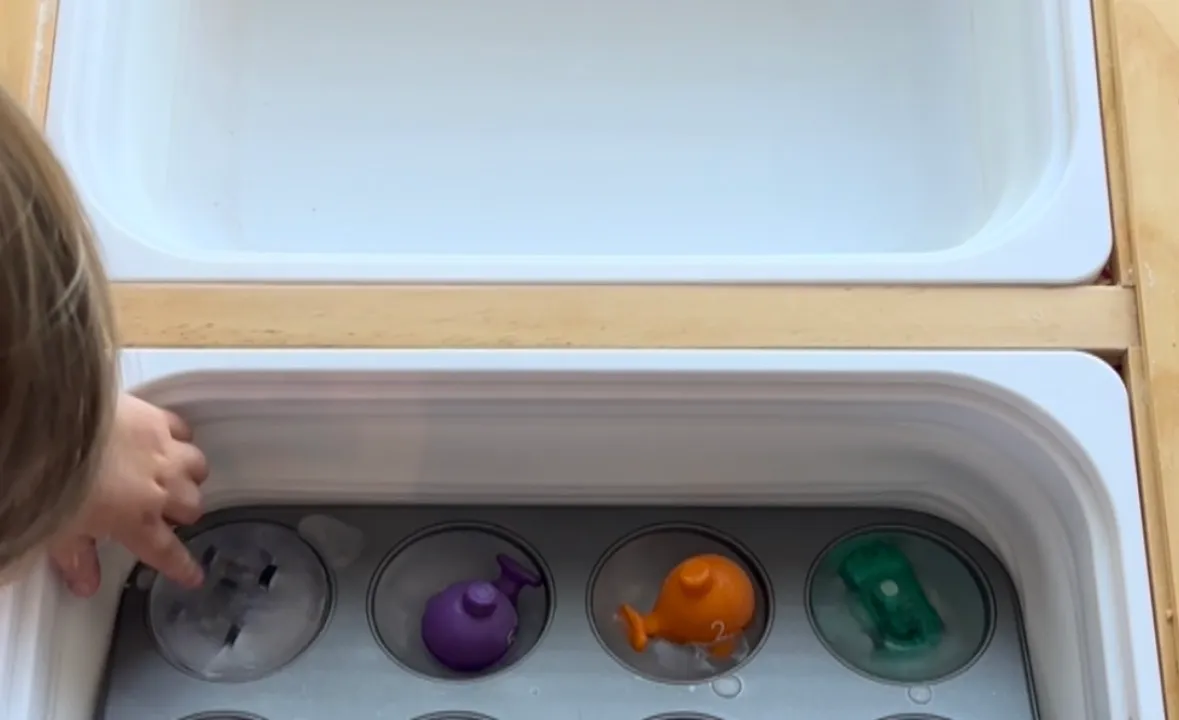
Stuff a few small toys into a flexible silicone muffin pan or into reusable water balloons. Add water and freeze overnight. The next day, dump the giant ice cubes into a bin and hand your toddler a spoon. The frozen toy rescue is the kind of overnight-prep activity that pays out big when she gets to it: 20+ minutes of focused, multi-stage play in our house. The melting itself becomes part of the activity.
Most variations of this activity I have seen use ice cube trays. I tried it with reusable water balloons because I wanted larger ice clumps for a more dramatic rescue, and they did work. The catch was getting the magnetic balloon halves apart once frozen. If I were doing this again, I would use a flexible silicone muffin pan, which seems to be the format other parents have had the most success with.
Below is the exact setup, materials, age tweaks for 2 through 4, what happened in our house, and the questions parents ask before trying frozen toy rescue.
Why Frozen Toy Rescue Works for Toddlers
Ice play is one of the most engaging sensory experiences for toddlers. The cold is unfamiliar, the texture is unique, and the act of melting (which she is doing with her hands and a spoon) gives her direct cause-and-effect feedback in a way few other activities do.
Add a rescue mission element, and the engagement deepens. The toy is trapped in the ice. Her job is to get it out. That goal-direction turns sensory play into problem-solving. She has to figure out how to make the ice melt faster (warm hands, the spoon, sometimes water if you offer it).
For toddlers between 2 and 4, this is also a soft introduction to scientific thinking. Ice melts. Water is cold but warmer than ice. Salt or warm water speeds the melt. None of this is taught directly. She figures it out through play.
What You Need
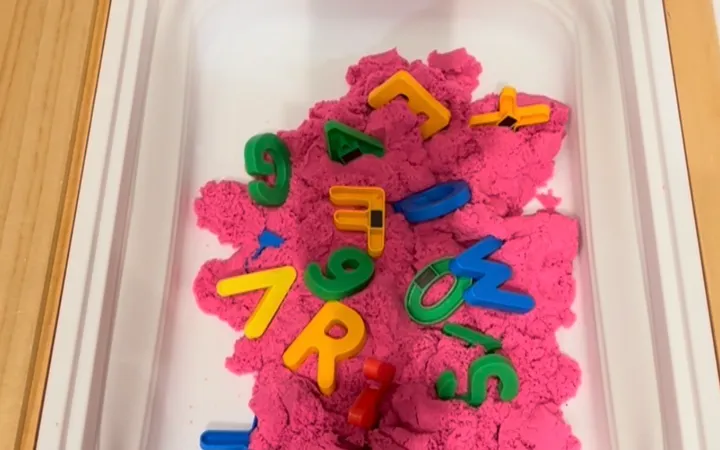
- 3-5 small toys (small figurines, kitchen scoops, small magnetic letters)
- A flexible silicone muffin pan or large ice cube tray
- Water
- A shallow bin
- A spoon, kid-safe hammer, or both
- A small cup of warm water (optional, for melting assistance)
- A towel underneath the bin
How to Set Up the Frozen Toy Rescue (Night Before)
- Place one small toy in each cup of the silicone muffin pan or ice cube tray.
- Fill each cup with water until the toy is fully covered. Leave a little space at the top for ice expansion.
- Place the tray flat in the freezer overnight.
- The next morning, pop the ice clumps out of the tray (silicone bends easily; metal and plastic trays may need a brief warm-water bath to release).
- Drop the ice clumps into a shallow bin and place the bin on a towel.
- Hand your toddler a spoon and demonstrate chipping at the ice.
Love this one? There are 75 more.
The 75 Toddler Activities Guide is a flip-through bank of screen-free activities, all using things you already have at home. Pick one, set it up, buy yourself 15–20 minutes.
See the 75 Activities Guide →Age Tweaks
Age 2: At 2, use larger toys (no smaller than her palm) so they are easier to grab once partially exposed. Use one or two ice clumps, not five. The rescue feels achievable, which keeps her engaged.
Age 3: At 3, all five clumps work. Add the warm water cup as a melting tool. Show her that pouring warm water on the ice speeds up the melt. The added control extends the play.
Age 4: By 4, you can introduce salt as a melting tool (with supervision so she does not eat it). Salt melts ice faster than warm water in some conditions, and watching the difference is a real science experiment.
What Happened When We Did It
She stayed with this for 20+ minutes, which is at the high end of any activity in our house. The melting was the hook. She kept poking at the ice with her spoon, watching the toy slowly emerge, and getting more focused as the ice got smaller.
I tried this with reusable water balloons because I wanted larger ice clumps and the balloons were the largest soft container I had. About half the water leaked out before the balloons fully froze, so I ended up with one giant misshapen ice block instead of separate clumps. She did not care. She still extracted the toys I had frozen inside, just took longer than I expected.
If I were doing this again, I would use a silicone muffin pan because the cleanup and the unmold are easier. The reusable balloons were a fun experiment but I would not recommend them for this specific activity.
No energy to plan tomorrow's activity?
The 75 Toddler Activities Guide does the thinking for you. 75 ideas sorted by setup time and materials. Less mental load for you, a happy and engaged toddler for them.
Get the 75 Activities Guide →Common Issues and Troubleshooting
The ice is melting too fast. You probably have warm hands or a warm room. Move the activity to a cooler spot, or freeze the ice clumps in larger sizes (half a cup of water per clump) so they last longer. You can also keep extra clumps in the freezer and add them as the first batch melts.
The ice is not melting fast enough. Add warm water to the bin or to a small cup as a melting tool. Salt also speeds the melt but introduces a safety concern for kids who taste everything.
My toddler is frustrated. Sometimes the ice is too solid for a small spoon to break. Pre-crack one of the ice clumps with a butter knife before she starts so she gets an early win. Or hand her a bigger spoon or a kid-safe plastic hammer.
Frequently Asked Questions
What age is the frozen toy rescue activity good for? This activity works for toddlers ages 2 to 5. Younger toddlers may need help getting the toys fully released. Older toddlers can experiment with melting tools and observe how different conditions speed up the melt.
Is this safe for toddlers who still mouth things? The ice is safe to taste, but the toys frozen inside are not edible. Use larger toys that cannot be swallowed and supervise closely. Avoid freezing small parts (small building blocks, beads) which are choking hazards.
How do I clean up after this activity? Pour out the melted water, dry the bin, and reclaim the toys. The toys may need a quick rinse if the water got dirty. The towel goes in the laundry. Total cleanup is 5 minutes.
Can I prep this activity ahead of time? Yes. The freezing step is the prep, and it has to happen the night before. You can also make multiple batches of frozen toy clumps and keep them in the freezer for surprise activity days.
What if I do not have a silicone muffin pan? A regular ice cube tray works for smaller toys. A small bowl filled with water and a toy works for one large clump. The flexibility of silicone makes the unmold easier, but it is not strictly required.
Mom to Mom
This is one of those activities where the prep happens at night and the payoff comes the next morning. If you can train yourself to set up activities the night before, this kind of overnight-prep activity is a goldmine. The first time you wake up to a ready activity, the morning is so much smoother.
Frozen toy rescue is great when you have 5 minutes the night before and a freezer. When you do not, the 75 Toddler Activities Guide does the thinking for you. 75 screen-free activities you can flip through in seconds, all using stuff already in your house. Pick one, set it up, and buy yourself 15-20 minutes. No prep spirals, no Pinterest searching, no guilt.
Want tonight's dinner hour back?
Drop your email. I'll send you TONIGHT, a 3-step reset plan plus 4 setup-free activities for the meltdown hour.
By signing up, you agree to receive the guide and emails from Katie. Unsubscribe anytime.